
Setting Up the Apple Developer Enterprise Program For iOS Signal Archiver
TeleMessage enables customers with an Apple Developer Enterprise Program to build and deploy Telegram Archiver for iPhone applications.
You can add a TeleMessage developer as an admin to your enterprise program so we can assist with the account setup. You will need to ask TeleMessage support for the details of the assigned developer.
If you do not wish to add a TeleMessage developer as an admin, you can setup the account by yourself.
If you do not have an Apple Developer Enterprise Program, apply here, or read the explanation here.
The process consists of two to six steps, depending on your chosen process:
*if you added a TeleMessage developer to your account, you are all set. You can send TeleMessage support the certificate and p8 file. If you chose not to add a TeleMessage developer, continue with steps 3 to 8.
1. Create and Provide iPhone distribution certificate
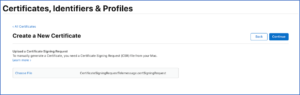
You will need a Mac to create the Certificate Signing Request file (CSR file). See Apple’s instructions here. If you don’t have a Mac, please contact TeleMessage support and we will create a CSR file for you.
Click Certificates and click the ![]() icon.
icon.
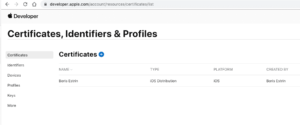
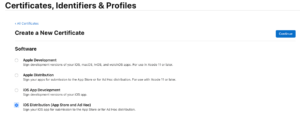
Select iOS Distribution (App Store and Ad Hoc) and click Continue.
The certificate file should be created by using the above-mentioned .CSR file . Then click Continue.
Click Download.
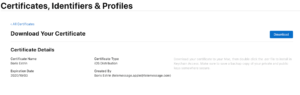
In case the CSR file was provided by TeleMessage – save the downloaded .cer. You will need to share it with TeleMessage support later. Otherwise click the .cer file to add it to Keychain.
- Open the Keychain Access
- Right click on the imported certificate and chose Export.
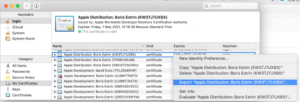
- Save the file as .p12 extension format and set a password. You will later need to share it with TeleMessage support.
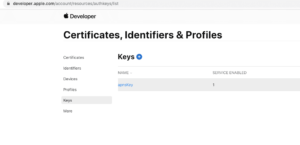
2. Create and Provide APNs key with key ID
Click on Keys and click the ![]() icon to Register a New Key.
icon to Register a New Key.
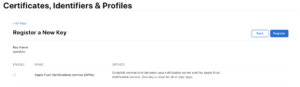
Click Register.
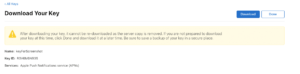
Click Download. A .p8 file will download.
- If you added a TeleMessage developer to your account, you are all set. You can send TeleMessage support the p12 file and p8 file.
If you chose not to add a TeleMessage developer, continue with the following steps:
3. Create New App Group
Click on identifiers and then click on the ![]() icon.
icon.
Create a unique identifier for signal group.
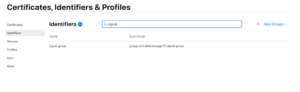
- Save the identifier in a text file. You will need to subsequently share it with TeleMessage support.
4. Create two new app IDs and assign specific capabilities
Tap on Identifiers and click the ![]() icon.
icon.
Create two new unique App IDs “Signal” with identifier like com.telemessage13.signal App Group from step 3.
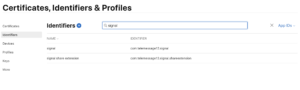
Name Identifiers signal com.telemessage13.signal (Also add capabilities: Push Notifications; Associated Domains, Communication Notifications, Data Protection (Complete Protection)) signal share extension com.telemessage13.signal.shareextension (Also add capabilities: Data Protection (Complete Protection))
First create App ID “signal” with unique bundle ID and add capabilities to the App ID:
- “App Groups” with the group from step 3
- Push Notifications
- Associated Domains
- Data Protection (Complete Protection)
- Communication Notifications

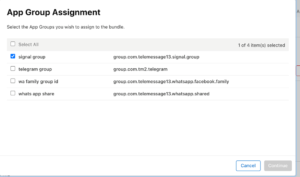
Save the App ID “signal share extension” with unique bundle ID. Add capability “App Groups” with the group from step 3 and Data Protection (Complete Protection) capability. You will need to subsequently share it with TeleMessage support.
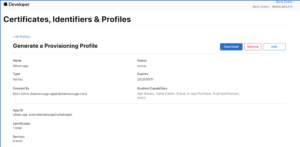
5. Create two new In-House provision profiles
Click on Profiles and click the ![]() icon to Create a New Profile.
icon to Create a New Profile.
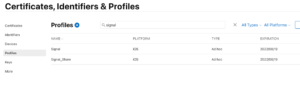
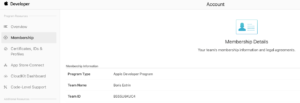
Provide an enterprise account’s team ID (string) and share it with your TeleMessage project or account manager.
6. Generating the Installation file
Send all deliverables to Telemessage support and CC your TeleMessage account manager.
6.1. Deliverables:
6.1.1. If TeleMessage developer was added to the account:
- Distribution certificate
- p8 file
6.1.2. If TeleMessage developer was not added to the account:
- Distribution certificate
- p8 file
- App groups identifier
- 2 app ID identifiers
- 2 profiles
- Team ID string
TeleMessage will create the new installation file (IPA) and update you once it’s done.
For more apple deployment options visit our guide.