
TeleMessage user provisioning sync to Microsoft Entra ID tenants using SCIM
SCIM – System for Cross-domain Identity Management – is an open standard that allows for the automation of user provisioning.
TeleMessage user provisioning implements a specific profile of the SCIM 2.0 protocol to allow Microsoft Entra ID tenants to use the “non-gallery application” feature in the Microsoft Entra application gallery. Once connected, Microsoft Entra ID uses the SCIM application to run a synchronization process every 40 minutes. The process queries the TeleMessage SCIM endpoint for assigned users and creates or modifies them according to the assignment details.
To connect to TeleMessage user provisioning using SCIM:
Setting up approved connection with TeleMessage backend
- Send your TeleMessage account manager the AD tenant ID. This will be used to set up an allowed connection between your Tennent’s SCIM application and your account on the TeleMessage provisioning service
Setting up the SCIM application in AD
- Sign into the Microsoft Entra admin center as at least an Application Administrator.
- Browse to Identity > Applications > Enterprise applications.
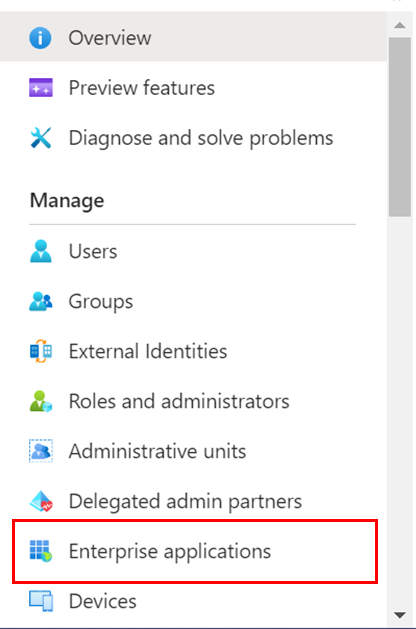
A list of all configured apps is shown, including apps that were added from the gallery.
- Select + New application > + Create your own application.
- Enter a name for your application
- Choose the option Integrate any other application you don’t find in the gallery
- Click Create.

The new app is added to the list of enterprise applications.
- Choose the new app to open its app management screen.
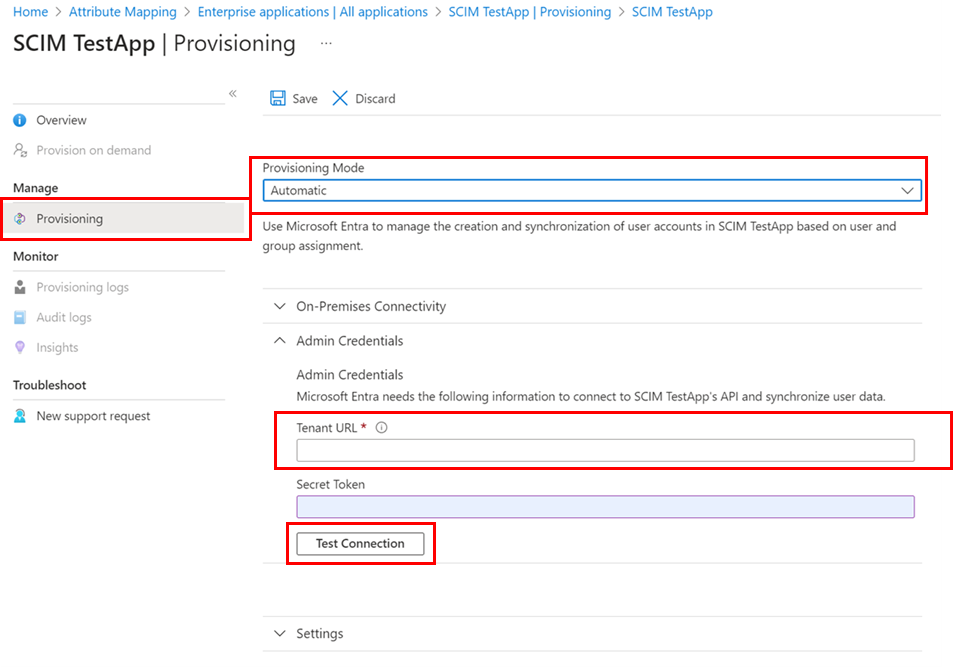
- In the app management screen, select Provisioning in the left panel.
- In the overview tab select Provisioning again.
- In the Provisioning Mode menu, select Automatic.
- In the Tenant URL field, enter the TeleMessage URL for SCIM endpoint: https://provisioning-gateway-service-charlie.kapi.telemessage.com/scim/v2
- Make sure you keep the Token field blank.
- Select Test Connection to have Microsoft Entra ID attempt to connect to the SCIM endpoint. If the attempt fails, error information is displayed.
- If the attempts to connect to the application succeed, then select Save to save the admin credentials.
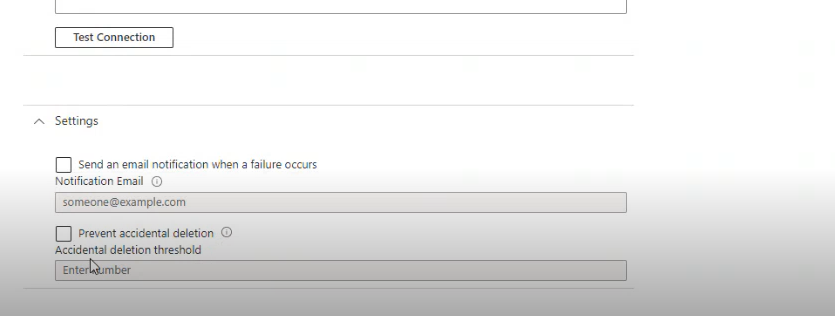
- Optional: adding email notifications for failure and deletion.
- Click Save on the top of the screen
Configuring the SCIM application to TeleMessage provisioning
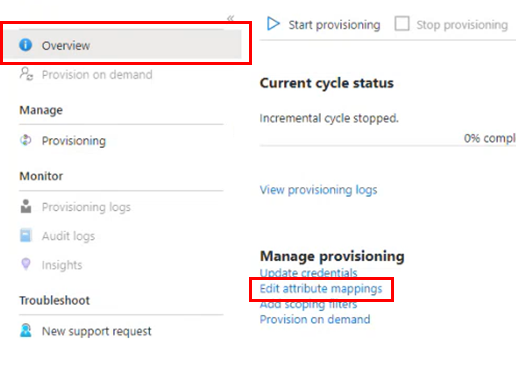
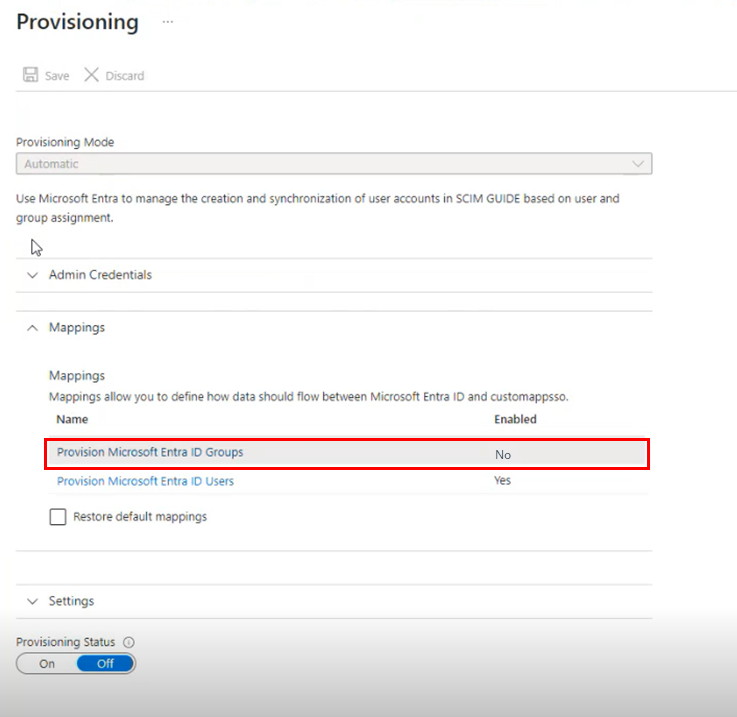
- Go to Overview > Edit attribute mapping
In the Mappings section, there are two selectable sets of attribute mappings: one for user objects and one for group objects.
- Set the group provisioning to
- Navigate to the users provisioning page to review and edit the attributes that are synchronized from Microsoft Entra ID to TeleMessage.The list of attributes below needs to be mapped as shown in the screenshot for the integration with the TeleMessage user provisioning system.All other mapping attributes should be removed.For a detailed explanation follow the steps below:
3.1 UserName
3.1.1 Click Edit
3.1.2 In the edit screen set Mapping type: Direct
3.1.3 Source attribute: Mobile
3.1.4 Match object using the attribute: Yes
3.1.5 Mapping precedence: 1

Note, when integrating with TeleMessage using SCIM always enter the user’s Mobile number in full international format (without the + plus sign or – dashes).
Remember that the specific format may vary by country, and some countries may have unique rules or variations. Here’s a general guide to populate the number in international format:
A. Country Code: Every international phone number starts with a country code, which is a numerical prefix that represents a specific country or region. Country codes are usually one to four digits long. For example, the country code for the United States is 1, and for the United Kingdom, it’s 44.
B. Area Code (Regional Code): Some countries have area codes, also known as regional codes or city codes. For example, the United States and Canada use area codes, while many European countries do not.
C. Local Number: Following the country code and, if applicable, the area code, you have the local number. This is the unique identifier for the specific phone line within that region and is usually split into two sections.
D. Leading Zeros:
Leading zeros in the area code are omitted – don’t include any leading zeros in the area code.
Some countries may have leading zeros in the local number. In such cases, include these zeros when populating the number.
E. Examples:
For a fictitious number in the United States: 123 456 7890 à 11234567890
For a fictitious number in the United Kingdom: 0123 456 7890 à 441234567890
For a fictitious number in Hong Kong: 1234 5678 à 85212345678
Keep in mind that phone number formats and conventions may change, and it’s always a good idea to verify the information with a reliable source or the local telecommunications provider if you have any doubts.
_____________________________________________
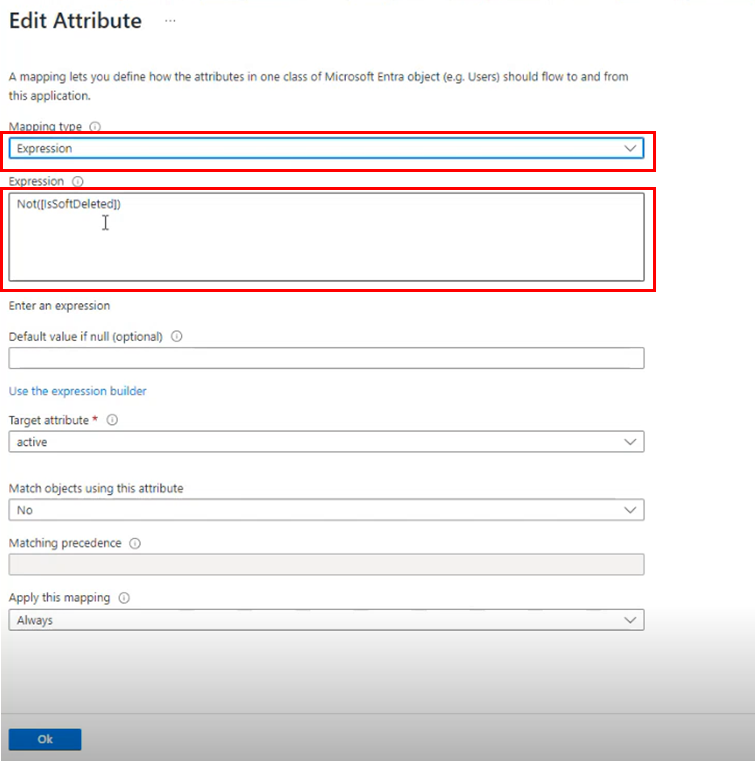
3.2 Active
3.2.1 Click Edit
3.2.2 In the edit screen set Mapping type to Expression
3.2.3 Expression to Not([IsSoftDeleted])
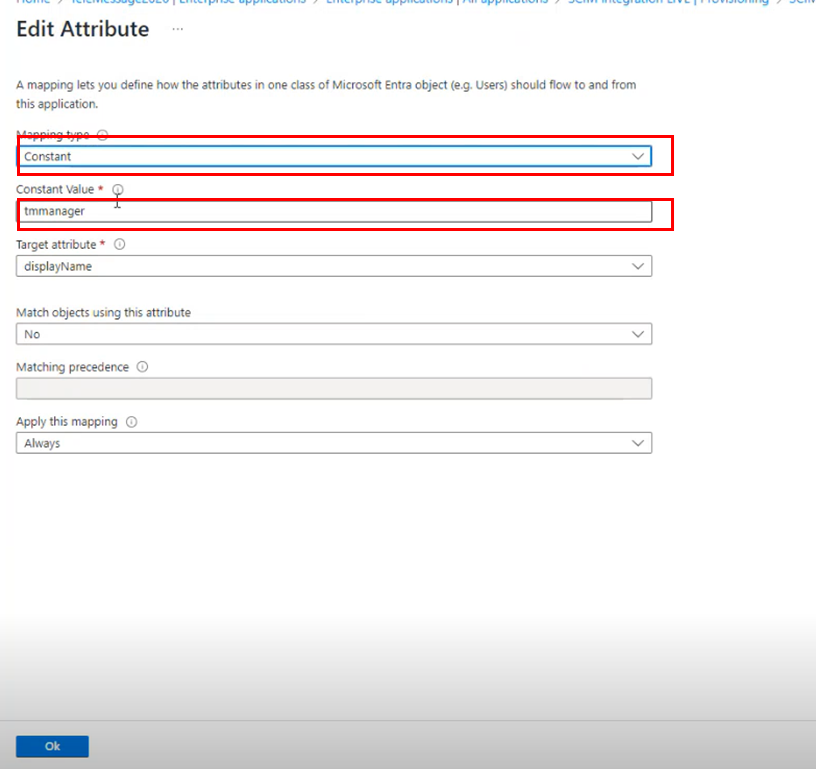
3.3 Display Name
3.3.1. Click Edit
3.3.2. In the edit screen set Mapping type to Constant
3.3.3. Set Constant Value to add the company manager name as set up in the TeleMessage endpoint (ask your account manager for the exact name)
If your company has multiple managers in the TeleMessage endpoint you will need to set up a SCIM app for each manager
3.4. emails[type eq “work”].value
3.4.1. Click Edit
3.4.2. In the edit screen set Mapping type to Direct
3.4.3. Source attribute: mail
3.5. name.givenName
3.5.1. Click Edit
3.5.2. In the edit screen set Mapping type to Direct
3.5.3. Source attribute: givenName
3.6. name.familyName
3.6.1. Click Edit
3.6.2. In the edit screen set Mapping type to Direct
3.6.3. Source attribute: Surname
3.7. externalId
3.7.1. Click Edit
3.7.2. In the edit screen set Mapping type to Direct
3.7.3. Source attribute: mobile
4. Click Save to save all mappings
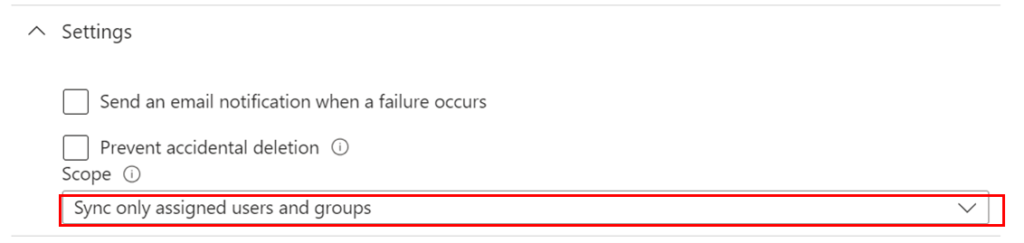
Configuring the users to be provisioned to TeleMessage
To assign the users you want to sync:
- Under Settings select Sync only assigned users and groups.
- Select the Users and groups tab > + Add user/groups

- Select None Selected > check the users to be provisioned > click Select > click Assign

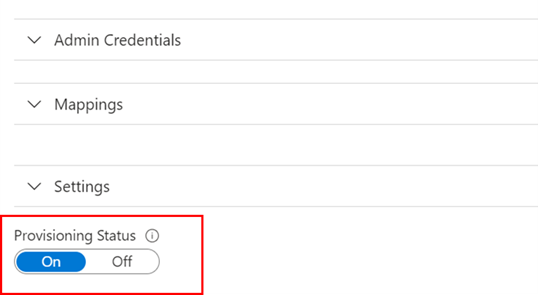
Enable SCIM
Once your configuration is complete, set the Provisioning Status to On.
Select Save to start the Microsoft Entra provisioning service.
Once the initial cycle has started, you can select Provisioning logs in the left panel to monitor the progress, which shows all actions done by the provisioning service on your app.
Note: The initial cycle takes longer to perform than later syncs, which occur approximately every 40 minutes if the service is running.