Microsoft/TeleMessage Data Connector Setup Guide
Overview
Microsoft enables O365 tenants to import their mobile communications into their outlook mailbox. This guide will instruct Microsoft tenants how to setup Data Connectors.
Setting up a Connector
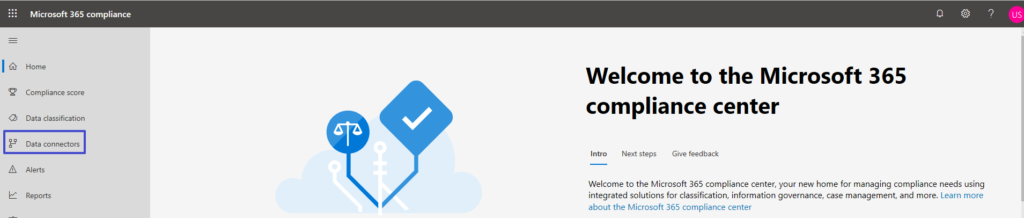
- Login to https://compliance.microsoft.com/homepage with your O365 admin credentials
- Select Data connectors
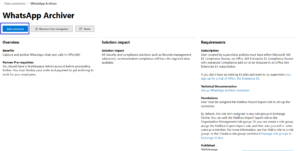
- Click the needed connector for your mobile archiving
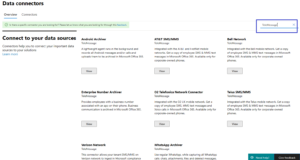
- Search for TeleMessage If you can’t find the connector you were looking for

- Click Add Connector
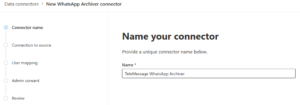
- Name the connector and click Next
- Click Login
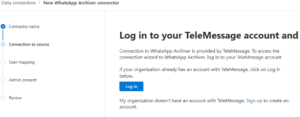
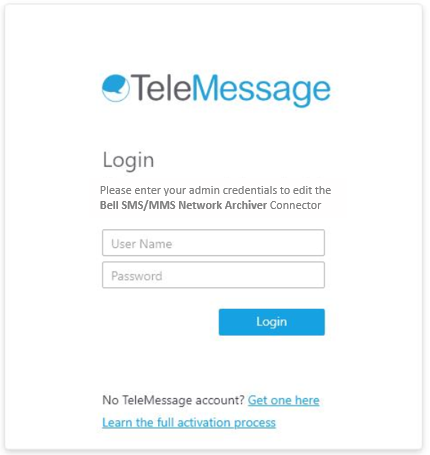
- Login with your TeleMessage admin credentials. If you don’t already have an admin account, click Get one here
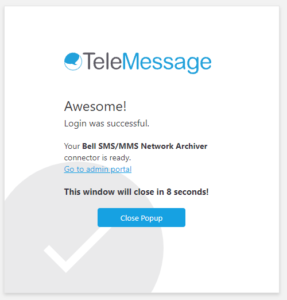
- Upon successful login, close popup to continue
 Take note, if login is not successful go to section 14 for further instructions. [Hyperlink]
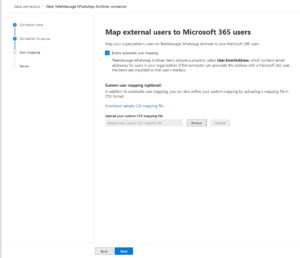
- Once the popup window is closed, the connector wizard will advance to the next step. Make sure Enable automatic user mapping is selected and Enter Next
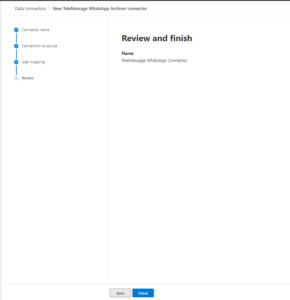
- Click Finish
- ClickDone
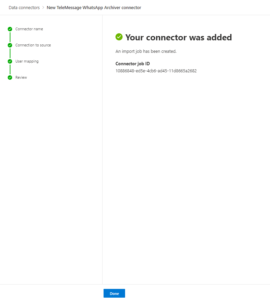
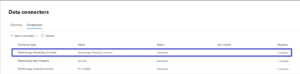
- The newly created connector will display in the connectors list.
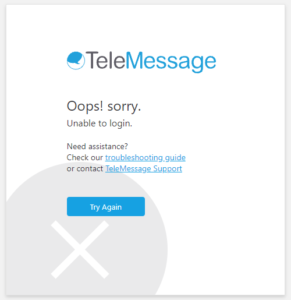
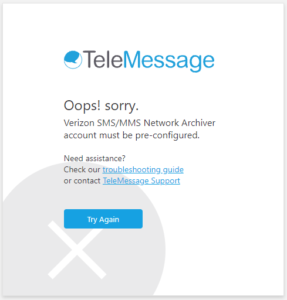
- TeleMessage login trouble shoting;
a. “Oops! Sorry. Unable to login”: the username or password do not match
b. “You are already set!”: the connector has already been activated. You can find it on the connectors tab on your Microsoftcompliance page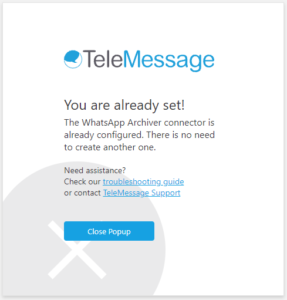
c. “Oops! Sorry. Verizon Network Archiver account must be pre-configured”: for a Verizon account, you need to supply TeleMessage with the mobile provider’s source details. Contact TeleMessage support for further instructions.
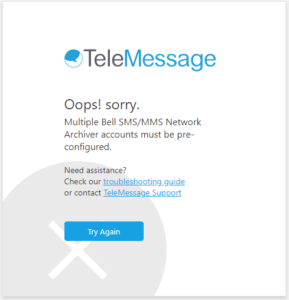
d. “Oops! Sorry. Multiple Network Archiver account must be pre-configured”: for your second and up Verizon \ Bell \ Telus \ AT&T accounts you need to supply TeleMessage with the mobile provider’s source details. Contact TeleMessage support for further instructions.